A cheat sheet to get the most out of Zoom teleconferencing
ニュースレターを購読する
As many of us adapt to working from home, it's an ideal moment to discover some of the best shortcuts, extensions, tips, and tricks to enhance your toolset. With teleconferencing coming to the fore as one of the most important means of staying in touch and keeping teams connected from home offices across the world, we've compiled some pointers to help you get the best out of the Zoom video conferencing tool and become a power user.
Luckily, Zoom itself is a straightforward tool to use so once you're comfortable enough navigating it, you can start checking out some extra features and best practices to help keep your meetings as productive and organized as possible.
Generate unique meeting IDs
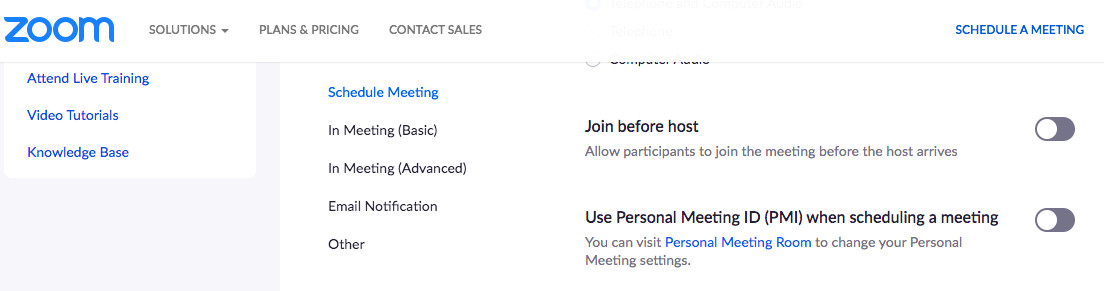
When you set up an account with Zoom, you’re provided with a Personal Meeting ID (PMI) or link. This provides you with your own virtual meeting room, perfect for hosting regular calls and meetings as it will always be accessible using the same id and link. However, for all other meetings, it is best to create unique per-meeting ids so that people cannot access your virtual space. Zoom has a video tutorial (accessible here) that explains clearly how to create random meeting ids.
Use your waiting room
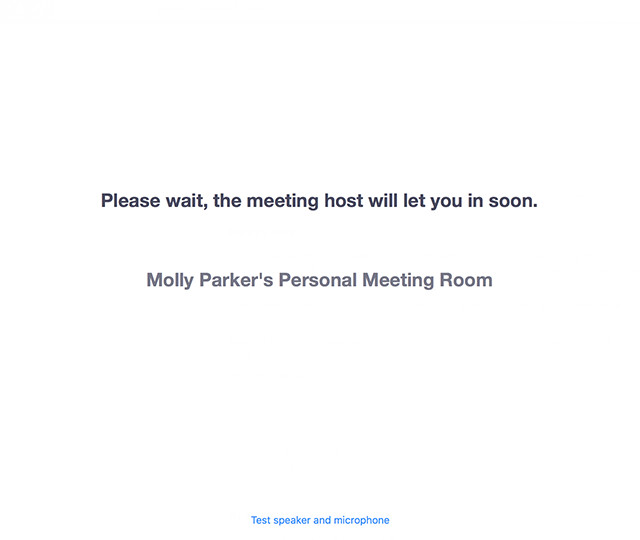
Activating the waiting room feature in Zoom will allow you to see who is joining a meeting before allowing them to enter. To switch on this feature, simply go to Account Management > Account Settings. Click on Meeting, then click Waiting Room to enable the setting. With this in action, as the host, you can admit attendees to the meeting one by one, or allow them all to enter the waiting room and have them join the meeting all at the same time.
Control your meetings
To maintain control of the meeting as the host, it helps to make sure that certain features are in place to define who can do what. Check to make sure nobody can join a meeting before the host (by disabling the “join before host” setting) but also consider disabling screen sharing and file transfers for non-hosts. For security reasons, it can also help to disable any auto saving features for meeting chats. If the meeting is large, consider assigning one or two colleagues as co-hosts to help keep things running smoothly.
Know your shortcuts
There’s nothing worse than being in a meeting, trying to stick to an agenda and answer questions while still fumbling for extensions. Keyboard shortcuts are a great way of overcoming this and keeping you quick-witted while answering questions and sharing information. Below are some of the most useful shortcuts, which in some cases, can save you hours of time per year, such as sharing an invitation in just 2 seconds.
I, for invite - Type Cmd + I (macOS) or Alt + I (Windows) to open the invitation window where you find the link to the meeting or share invitations with others.
M, for mute - Type Cmd + Ctrl + M (macOS) or Alt + M (Windows) when you are the meeting host and want to mute everyone else on the line.
S, for sharing - Type Cmd + Shift + S (macOS) or Alt + Shift + S (Windows) to share your screen.
V, for video - Type Cmd + Shift + V (macOS) or Alt + Shift + V (Windows) toggle video on and off.
To enable shortcuts even while you’re using Zoom and have other windows open, go to Settings > Keyboard Shortcuts and toggle Enable Global Shortcut.
Start with audio muted and camera off
To give yourself a few moments to prepare as you enter into a meeting, it’s always a good idea to have your audio and camera disabled. Even if you’re accustomed to doing this, it’s helpful to have Zoom set to this by default for busier days when you might forget. To enable this, simply go to Settings > Audio > Mute Microphone When Joining A Meeting, followed by Settings > Video > Turn Off My Video When Joining A Meeting.
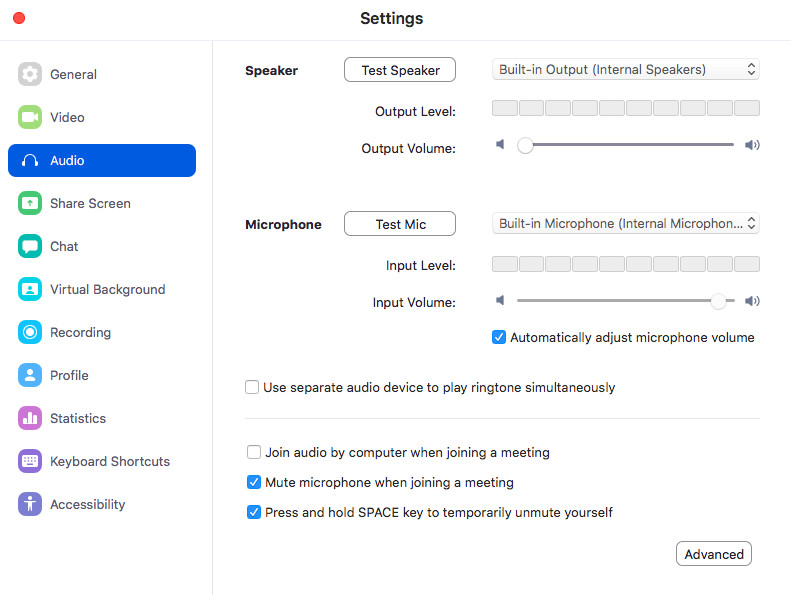
*Extra tip: Best etiquette dictates that when you’re not speaking in a teleconference, it’s best to remain on mute; however, to quickly mute and unmute yourself without fumbling for the microphone, you can press and hold the spacebar to do so right from your keyboard.
Decide who you see
Zoom will automatically show you who is speaking by default; however, you have some choices here regarding the format you prefer best. If you look to the upper hand corner of the screen during a meeting, you can click on Gallery View, which will enable you to see everyone on the call at once in a checkerboard view. This will show you a maximum of 49 of the participants on the call per page. You can set this as a default view for each meeting from the settings menu; go to Settings > Video > Meeting, and click on Display up to 49 participants per screen in "Gallery View”.

You can also hide your own video from your screen for a clearer view of participants — simply right click on your own video and select Hide Myself. You can undo this by right-clicking on participant videos and selecting “Show Myself”.
It can also help to hide non-video participants to make space for your screen and focus during calls — click on Settings > Video > Meetings, and toggle on “Hide Non-Video Participants”.
Use annotations for collaboration
Annotation tools are a great way to inject some creativity and the collaborative spirit you may be missing from group dynamics in the office. With annotation tools on Zoom, employees can draw, highlight and comment directly on the screen to give feedback, a useful option for critiquing or discussing proposals for layouts, photo-shoots or blueprints. To annotate as someone shares their screen, click on the top window on View Option > Annotate — you will be shown a toolbar to start annotating with.
The presenter can then use the save button on the toolbar to save the whole image, including the annotations as a screenshot. Or if you prefer, you can also disable attendee annotation altogether.
Record a meeting
In the case that not everyone can attend meetings (crossovers for time zones can be a common reason), it’s helpful to be able to record and edit meetings to save for later rather than taking notes; you’ll especially want to have a record of a meeting where great ideas start to emerge. Here are some cases where it’s helpful to record a meeting:
- Webinars Record a webinar and save it to distribute later as a creative asset.
- Interviews Give more focus to your interviewee by not having to frantically take notes.
- Save ideas When brainstorming, keep a record of those great ideas.
- Time Zones With a crossover of hours, not everyone may be able to attend in real-time but can check in on what was discussed later.
Only the meeting host can record the meeting by default; however, it's easy to allow other participants the ability to do so. The host can do so by clicking on Participants and looking for the More button next to an individual's name and then selecting Allow Record.
Once in a meeting, those wishing to record can simply click the Record button to begin capture, at which point the Record button will change into two buttons: One to pause and another to end. When you're finished recording, Zoom will store your video temporarily to be encoded into MP4 format, once the meeting has ended. You can also have the audio of the recording instead.
*Extra tip: Planning on editing your video later? Before the call starts, in the Zoom settings menu, under the Recording section, select “Optimize for 3rd party video editor” for an MP4 file that will be easier to work with using editing tools later.
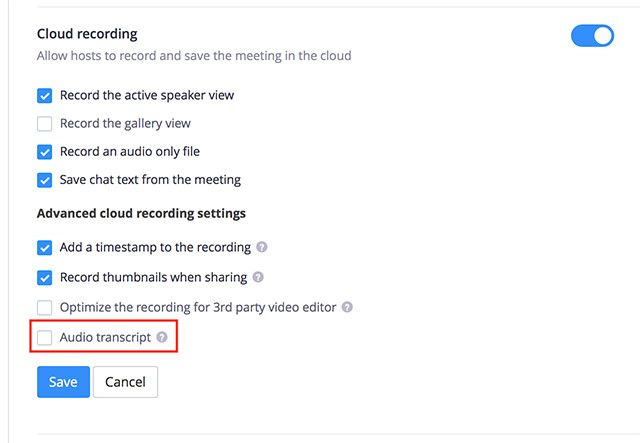
Record transcripts
Save the work of listening back and transcribing interviews and meetings by opting to record transcripts instead. This feature automatically transcribes the audio of a meeting or webinar that you record to the cloud. As the host of the meeting, you can edit your own transcript. Also, once you share the recording, your employees can navigate it faster as people can scan the text, search for keywords, click on any word in the transcript to access the video at that moment, or download the full transcript.
See who attended
This feature is only available on paid Zoom plans but is helpful for larger meetings. If you’re using Zoom to host webinars, conferences or lectures, it’s helpful to know who attended. Luckily you can access this in a report once the call finishes. To access this information you will either need to be the host, have a position where usage reports are enabled for you or you are an account owner or admin.
You can access the attendees from your meetings under Zoom Account Management in the Reports section. Under usage reports, select Meeting; from here you can find the meeting that you need and generate the necessary report.
Virtual Background
This fun feature allows you to upload an image of whatever you want – a client logo or headquarters, a natural landscape, or even a professional office, to give you your own custom background. It can also be useful for moments when your office or room needs tidying and you need a quick disguise. Green screens will make a big difference in the execution but are not necessary. However, try to take extra care to have uniform lighting and positioning for best results. If you’re short on inspiration, there are plenty of outlets compiling some of their favorite virtual backgrounds, such as this list from Tech Republic.
Try a touch-up
Using the "Touch up my Appearance" feature on Zoom will give your display a soft focus, which helps improves the overall appearance of your skin, smoothing any fine lines and fading any bags under your eyes. Simply toggle it on from Settings > Video > Touch up my Appearance
Author
Katie-Pia Moran